
The SpacePi X4 filament dryer is engineered for serious 3D printing users, offering powerful multi-spool capacity, independent drying chambers, and intelligent moisture control. To keep your X4 performing at its best, regular firmware updates and timely hardware maintenance are essential.
This guide walks you through how to upgrade your firmware and replace key components such as the power supply, motherboard, and fans, ensuring your dryer stays in top condition.
Firmware Upgrade Instructions for SpacePi X4
Upgrading your firmware ensures you’re using the latest features and improvements. Please follow these steps carefully:
Step-by-Step Process:
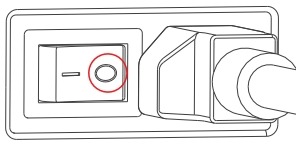
1. Power off the device.
Locate the power switch on your SpacePi X4 and turn it off.
2. Download the latest firmware.
Visit the Creality Download Center, navigate to the Ecosystem section, and download the latest firmware for the SpacePi X4.

3. Transfer firmware to TF card.
Copy the firmware file to the root directory of a TF card (not included with the device).

4. Insert TF card into the dryer.
Insert the TF card into the slot located at the bottom of the dryer.

5. Turn on the device.
Switch on the power. The firmware upgrade will start automatically.
6. Wait for the upgrade to complete.
Once the upgrade finishes, you’ll see a completion message on the display.

7. Remove the TF card and verify.
Power off the unit, remove the TF card, and restart the device to check and confirm the firmware version.
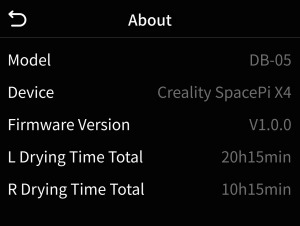
Note: If the upgrade fails, please repeat the above steps. UI design may vary slightly with newer firmware versions.
SpacePi X4 Hardware Replacement: Power Supply, Motherboard & Fans
For users requiring hardware replacements, below is a detailed breakdown of how to safely service key components of the SpacePi X4. Ensure the power is completely disconnected before beginning any replacement work.
SpacePi X4 Power Supply Replacement
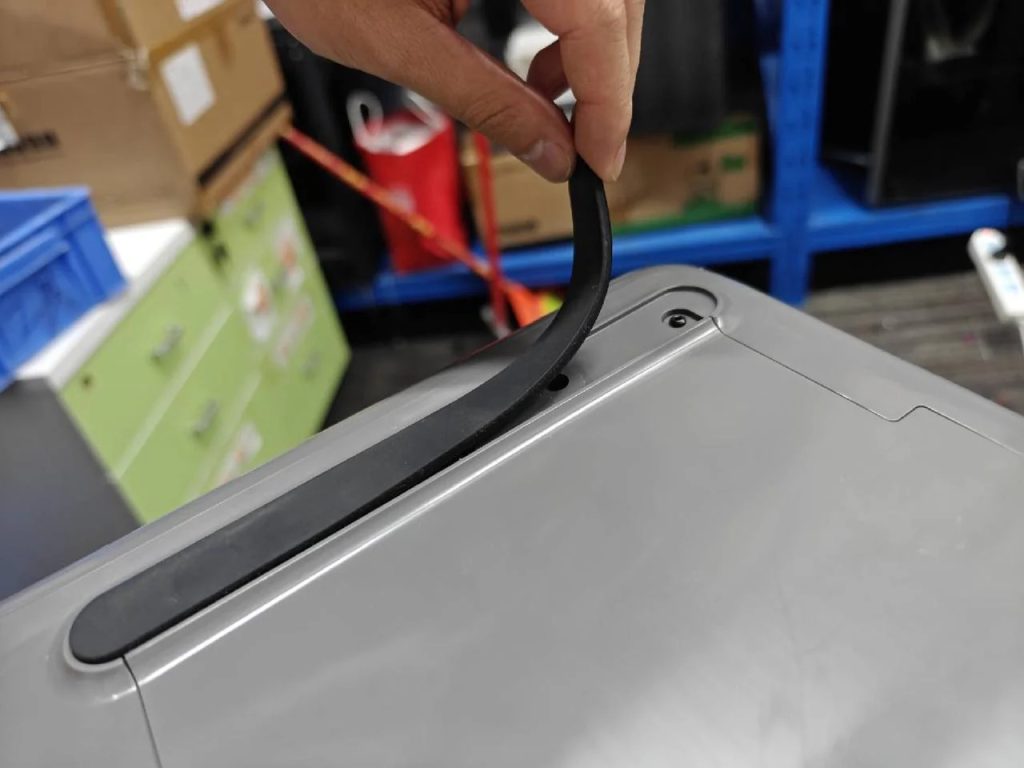
1. Remove silicone strips from both sides of the base to access the screws.

2. Unscrew the base panel using a hex key and Phillips screwdriver.

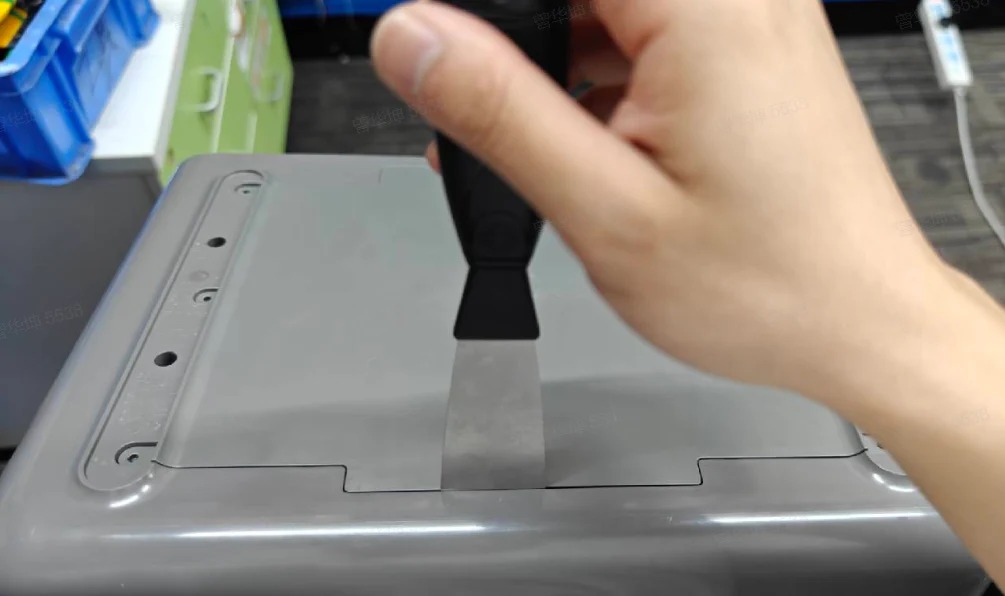
3. Pry open the bottom cover with a flat tool.
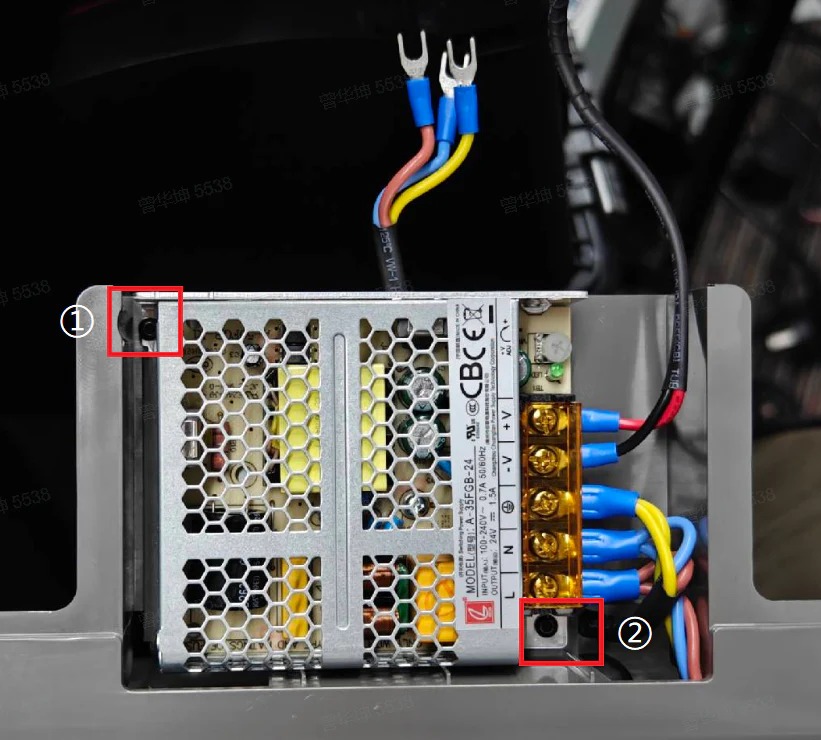
4. Disconnect three sets of wires connecting the power module to the motherboard and rear panel.
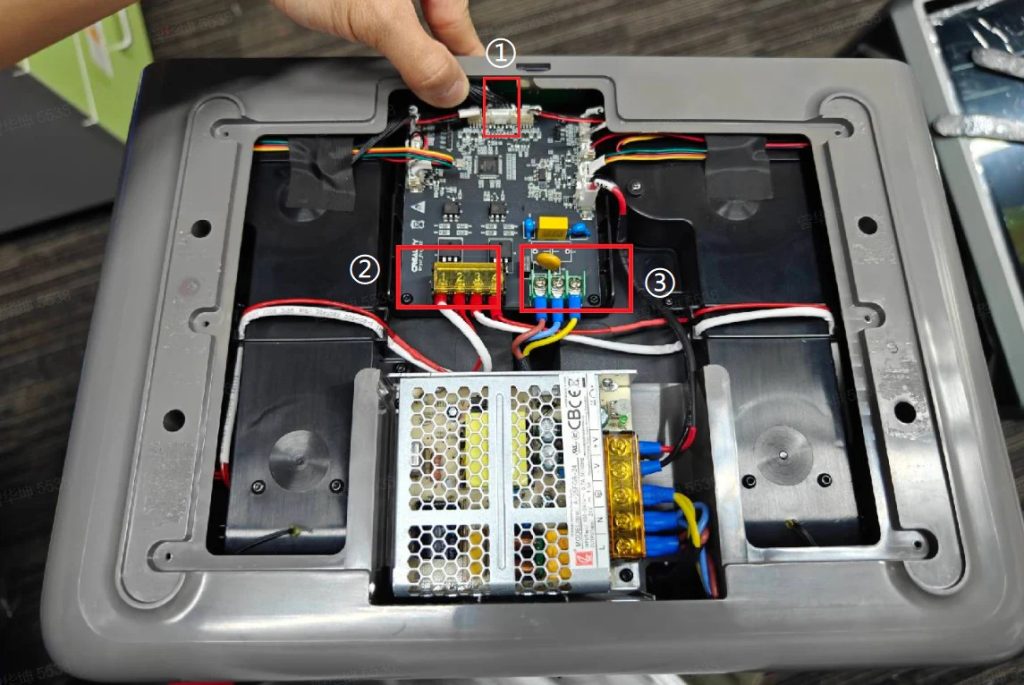
5. Unscrew and remove the power supply, then install the new unit in reverse order.
SpacePi X4 Motherboard Replacement
1. Repeat steps 1-3 from the power supply section.
2. Disconnect all cables from the motherboard.

3. Remove four screws securing the motherboard.

4. Install the replacement motherboard and reconnect all wires accordingly.

SpacePi X4 Internal Fan Replacement
1. Follow steps 1-4 from the motherboard replacement.
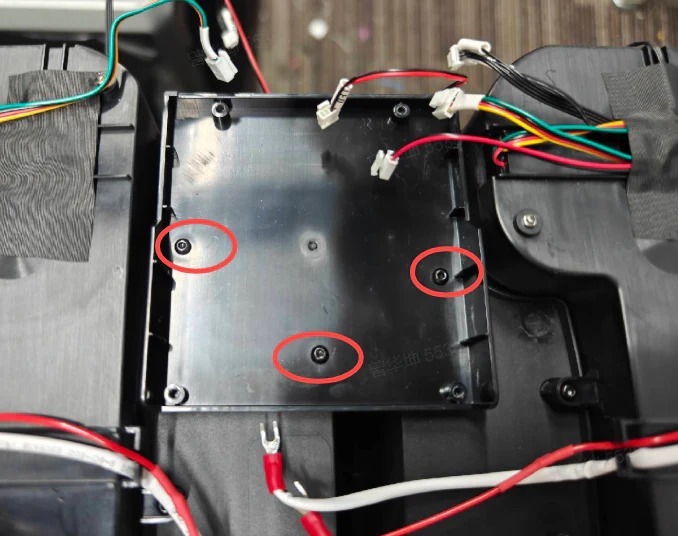
2. Unscrew the motherboard bracket (3 screws) and remove it.
3. Detach the duct cover by removing 8 M3x8 screws.

4. Carefully remove the cover without pulling the wires between the blower fan and sensor.
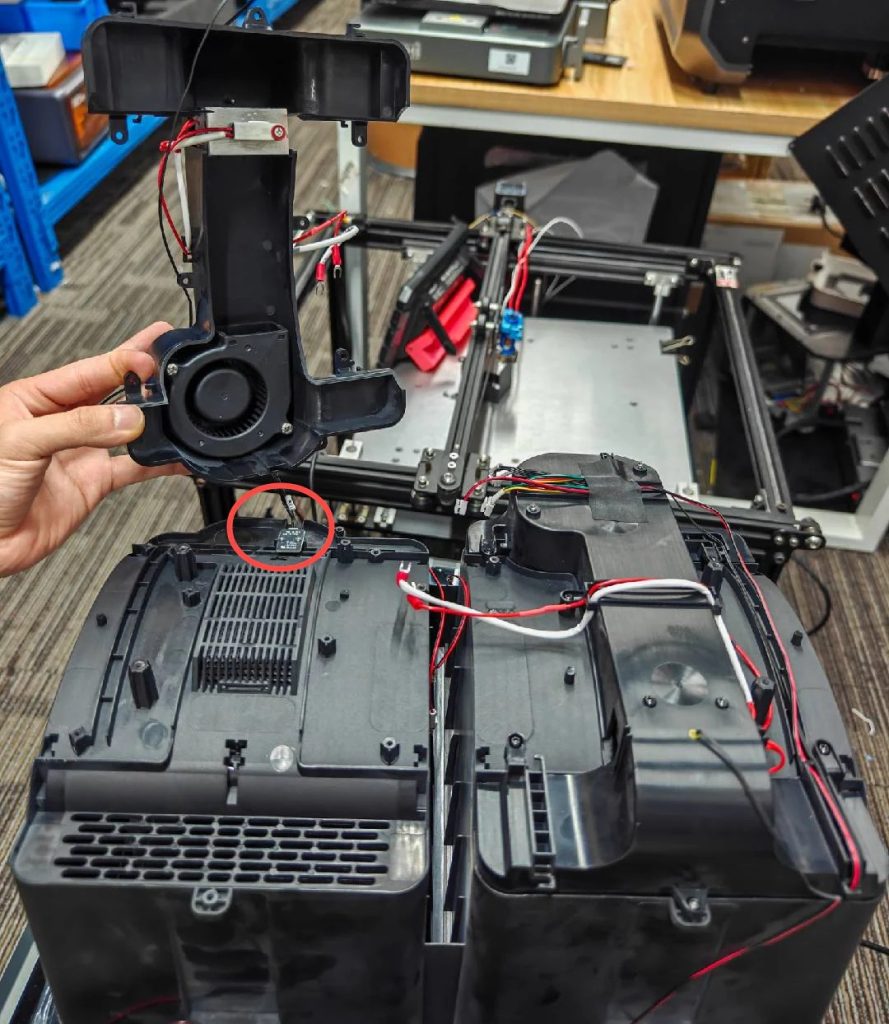
5. Unscrew and disconnect the blower fan, then replace it with a new unit.

Final Notes
Regular firmware updates and timely component replacements ensure the Creality SpacePi X4 delivers optimal filament drying performance. With its intelligent design and robust build, the X4 is built to meet the needs of high-volume and multi-material 3D printing operations.
For the latest software updates, user manuals, or support, please visit the Creality official website.
This article was originally published by Creality.
