あなたの真新しい箱を箱に入れただけです Creality K2 ProまたはK2 Proコンボ3Dプリンター? あなたは間違いなくそれが動作しているのを見たいと思っています. このステップバイステップ K2 Proコンボセットアップガイド あなたが始めるために必要なすべてをあなたに歩き回ります— から ボックス化とインストール に パワーオン, セルフチェック, フィラメントの負荷, そしてあなたでさえ 最初のテスト印刷. を使用して K2 Proコンボ 私たちの例として, プロセス全体を簡単にカバーします, 初心者向けの言語が自信を持って印刷を開始し、すぐに完璧な結果を達成できるようにすることができます.
K2 Proコンボのボックス化
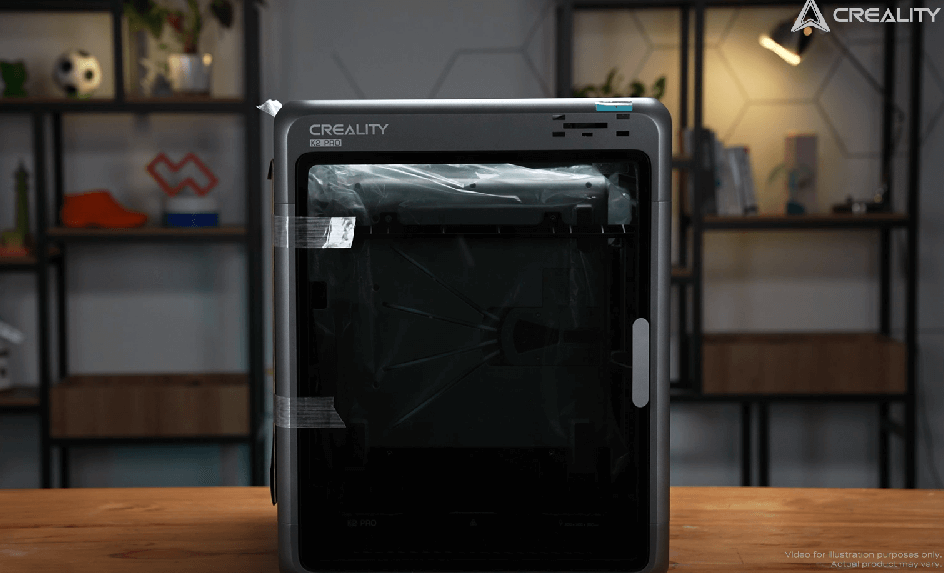
あなたが始める前に Creality K2 Proコンボアフボックス化, パッケージをフラットに置きます, 快適に働くための十分なスペースがある安定した表面. プリンターはaに到着します 安全な, 保護ボックス 輸送中にすべてのコンポーネントを安全に保つように設計されています. 開く前に, 少し時間を取ってください ボックス化されていないステッカーを読んでください 外側のパッケージに — 重要なものが含まれています 安全と取り扱いの指示 スムーズに開梱し、部品の損傷を避けるために. これらの簡単な手順に従うことで、あなたへの安全なスタートが保証されます K2 Pro Combo Setup Journey.
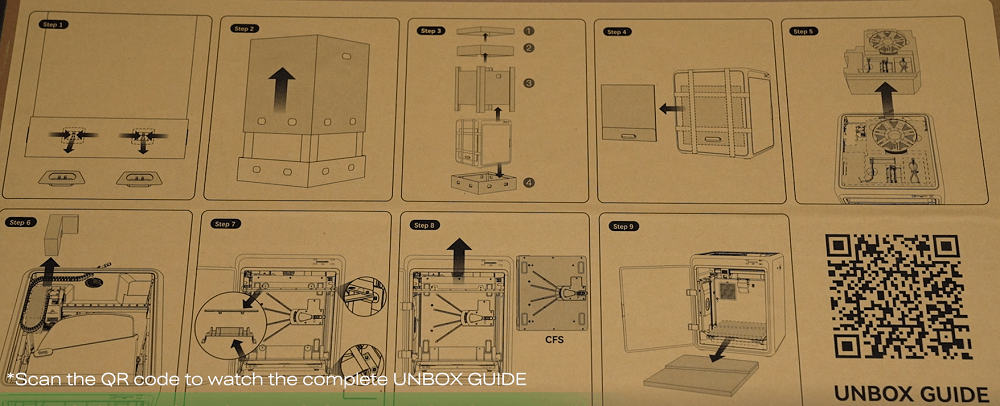
あなたを始めるために Creality K2 Proコンボアフボックス化, 最初にリリース 8つの接続留め金 箱の端の周り. 次, グリップします カットアウトハンドル 両側で、パッケージの上半分を優しく持ち上げます. 内部, あなたが見つけるでしょう 保護キャップ, クイックインストールガイド, そして、上部フォーム層—これらを注意深く削除し、脇に置きます. 下に, を取り出します 保護フォームとアクセサリーパック, 次に、残りの外側の包装材料を取り除き、プリンターとそのコンポーネントに完全にアクセスします.
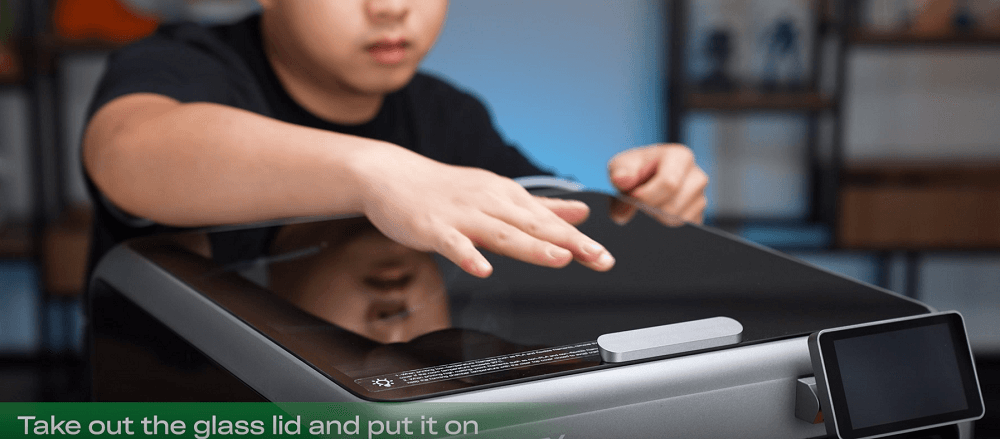
パッケージをクリアした状態で, 気をつけてプリンターを箱から持ち上げます そして、それをフラットに置きます, 安定した表面. あなたは気づくでしょう箱入りのふた プリンターの側面に接続されています — これを削除し、後のアセンブリのために脇に置きます. 次, 開きますガラスドア 内部コンポーネントにアクセスします.
内部, いくつかの輸送安全要素を削除する必要があります:
-
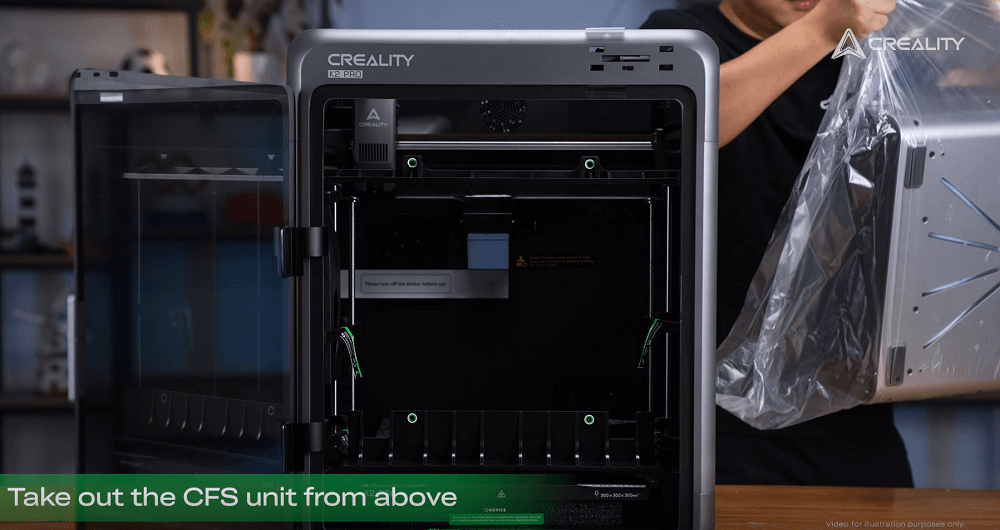
開始しますCFSを固定する4つのネジ (クリーリティフィラメントシステム), 次に、CFSユニットを上から持ち上げます.
-
から保護フォームを削除しますビルドプレート.
-
ロックネジを外して脱ぎますCFSガードレール.
-
を取り除きますZ軸ファスナー.
-
剥がれます保護ステッカー リア冷却ファンから.
-
ついに, を削除しますビルドプレートを固定する4つのネジ.
この段階で, K2 Proコンボは完全に開梱されており、インストールプロセスの準備ができています.
K2 Proのインストール
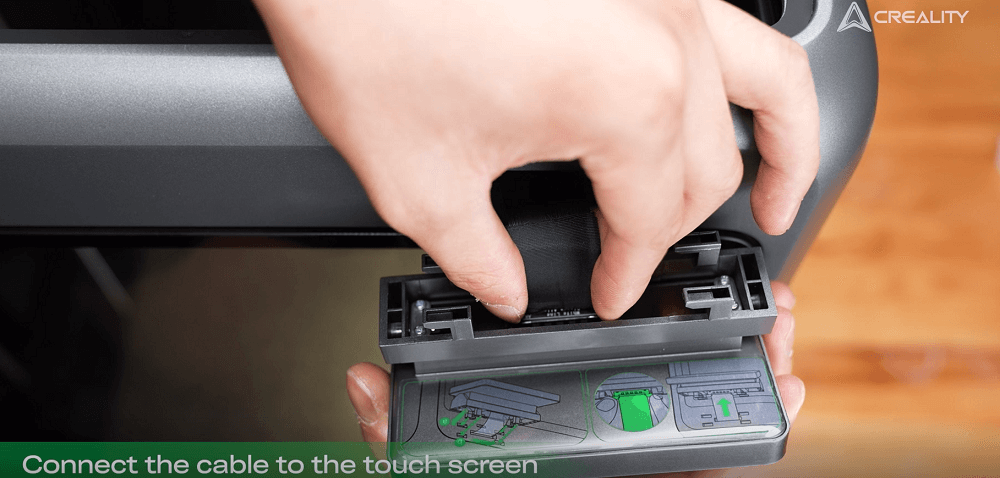
タッチスクリーンを接続します
-
フロントパネルの接続穴に画面ケーブルを渡す.
-
ケーブルをタッチスクリーンに差し込みます.
-
クリックするまで画面をスロットに押し込みます.
ガラスの蓋を取り付けます & CFS
-
プリンターの上にガラスの蓋を置きます.
-
プリンターフレームの上にCFSユニットを配置する.
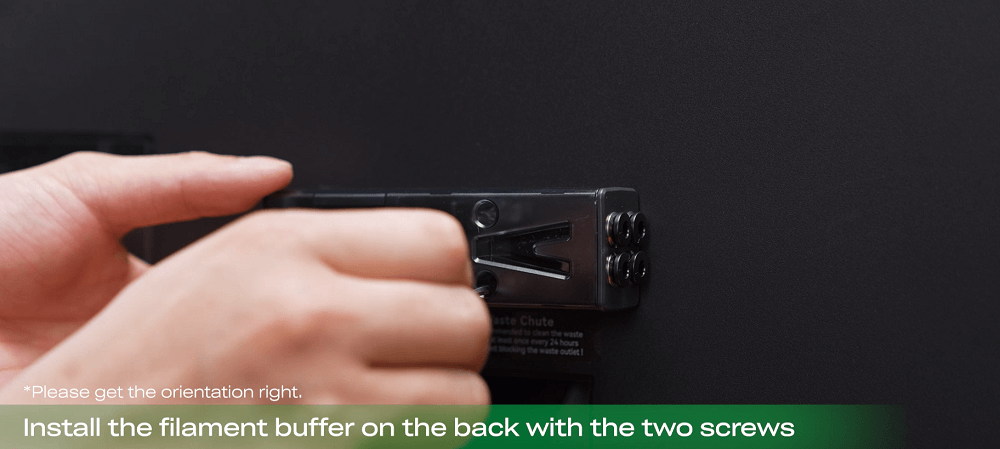
フィラメントバッファーを取り付けます
-
フィラメントバッファーを準備します, 2本のネジ, そしてアレンレンチ.
-
ネジを使用してプリンターの背面にフィラメントバッファーを固定します.
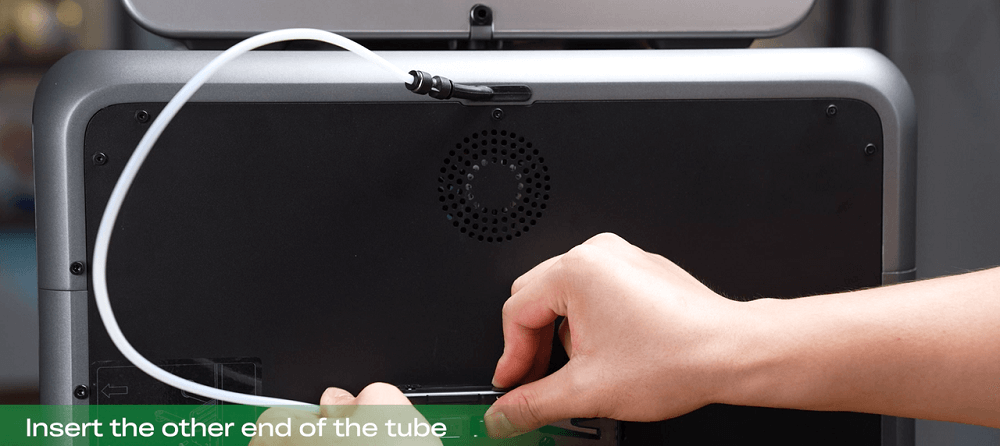
PTFEチューブを接続します & 485 ケーブル
-
PTFEチューブの一方の端を押出機の入口に挿入します.
-
バッファラッチを左に押し、チューブのもう一方の端を挿入します.
-
別のPTFEチューブを使用して、バッファーインレットをCFSに接続します.
-
ショートを使用してフィラメントバッファーをCFSに接続します 485 ケーブル.
-
ロングを使用してプリンターをCFSに接続します 485 ケーブル.
電源を入れます
-
電源ケーブルを接続します.
-
プリンターをオンにします.
-
画面上の起動ガイドに従って、最初のセットアップを完了します.

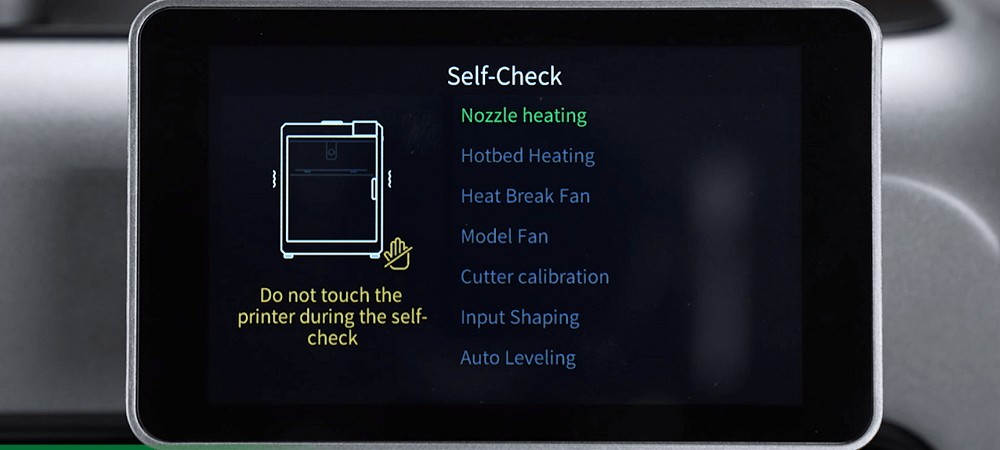
パワーオン & セルフチェック
インストールが完了したら, K2 Proコンボを実現する時が来ました. プリンターをオンにするだけです, そしてそれはそうするでしょう自動チェックを自動的に開始します. このプロセスにより、すべての重要なコンポーネントが保証されます — モーションシステムからセンサーまで — 印刷を開始する前に正しく機能しています.
中断することなくセルフチェックを完了するようにします. プロンプトが表示されたとき, 保護フォームを取り外します 操作中に適切な動きを確保するために加熱されたベッドの下.
次, インストールしますRFIDフィラメント 栄養チューブに挿入することにより. K2 Proコンボは即座に行われます自動シンクフィラメント情報, 手動構成の問題を節約します. あなたが望むなら, また、非RFIDフィラメントをロードして、タッチスクリーンインターフェイスを介してフィラメント設定を手動で編集することもできます。.
セルフチェックが完了し、フィラメントがロードされます, あなたのK2 Proコンボは、その最初の印刷のために完全に準備されています.
フィラメントの読み込み & 最初の印刷テスト
-
必要に応じて追加のフィラメントをロードします.
-
タッチスクリーンから, ローカルプリロードモデルを選択します.
-
印刷を開始し、最初の層の接着と印刷品質を観察します.
最良の結果, を使用してみてください3dbenchy ボートモデル — 3Dプリンターパフォーマンステストのための広く認識されているベンチマーク.
第一印象 & 結論
から最初のプリントへのボックス化, K2 Proコンボは、スムーズで初心者向けのセットアップエクスペリエンスを提供します. コンポーネントのモジュラー設計, 直感的なケーブル接続, そしてクリーリティフィラメントシステム インストールを迅速かつ手間をかけないでください.
のRFIDフィラメント検出 新しいユーザーにとって素晴らしいタッチです, 手動パラメーターのセットアップの必要性を排除します. キャリブレーションモデルを印刷する場合でも、最初の実際のプロジェクトを開始する場合でも, K2 Proコンボは、すぐに高品質の結果を提供する準備ができています.
+1
+1
1
+1
+1
