Just unboxed your brand-new Creality K2 Pro or K2 Pro Combo 3D Printer? You’re no doubt eager to see it in action. This step-by-step K2 Pro Combo setup guide will walk you through everything you need to get started— from unboxing and installation to power-on, self-check, filament loading, and even your first test print. Using the K2 Pro Combo as our example, we’ll cover the entire process in simple, beginner-friendly language so you can start printing with confidence and achieve perfect results right out of the box.
Unboxing the K2 Pro Combo
Before you begin your Creality K2 Pro Combo unboxing, place the package on a flat, stable surface with plenty of room to work comfortably. The printer arrives in a secure, protective box designed to keep every component safe during transit. Before cutting it open, take a moment to read the unboxing sticker on the outer packaging — it includes important safety and handling instructions to help you unpack smoothly and avoid damaging any parts. Following these simple steps will ensure a safe start to your K2 Pro Combo setup journey.
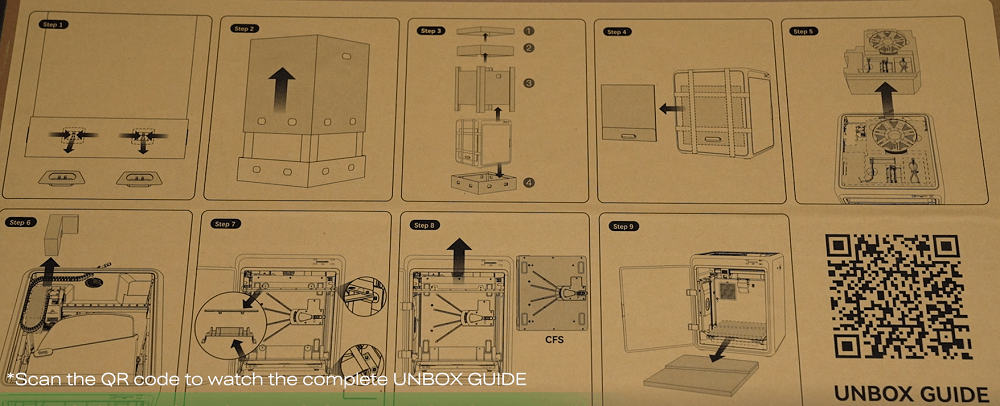
To begin your Creality K2 Pro Combo unboxing, first release the eight connecting clasps around the edges of the box. Next, grip the cut-out handles on both sides and gently lift off the top half of the packaging. Inside, you’ll find the protective cap, quick installation guide, and top foam layer—remove these carefully and set them aside. Beneath, take out the protective foams and accessory packs, then strip away any remaining outer packaging materials to fully access the printer and its components.
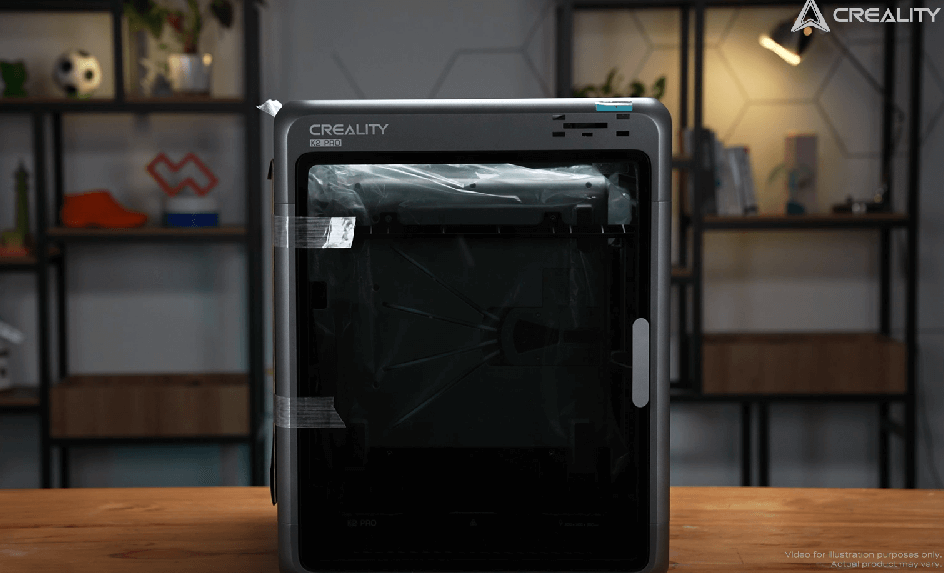
With the packaging cleared, carefully lift the printer out of the box and place it on a flat, stable surface. You’ll notice a boxed-up lid attached to the side of the printer — remove this and set it aside for later assembly. Next, open the glass door to access the internal components.
Inside, you’ll need to remove several transport safety elements:
-
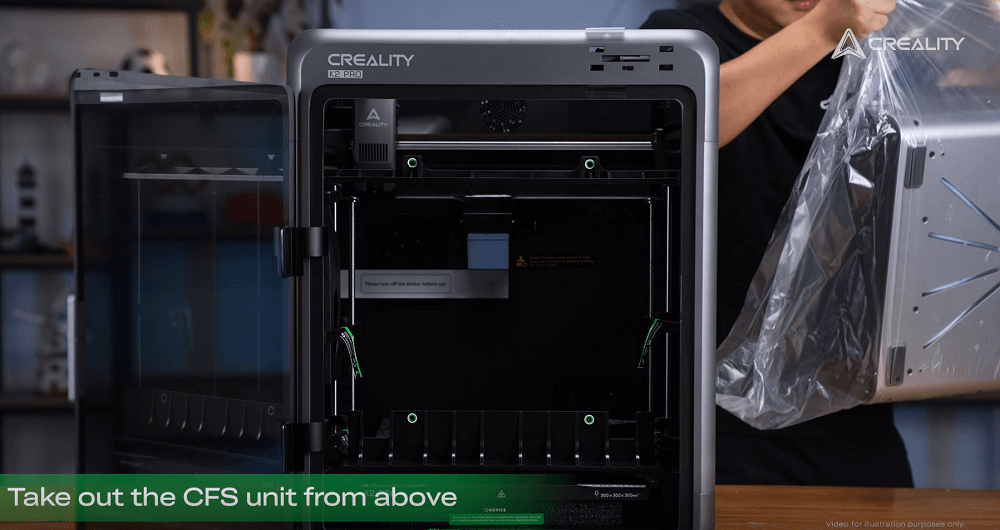
Start by unscrewing the four screws securing the CFS (Creality Filament System), then lift the CFS unit out from the top.
-
Remove the protective foams from the build plate.
-
Unscrew the locking screws and take off the CFS guard rails.
-
Strip away the Z-axis fasteners.
-
Peel off the protective sticker from the rear cooling fan.
-
Finally, remove the four screws securing the build plate.
At this stage, your K2 Pro Combo is fully unpacked and ready for the installation process.
Installing the K2 PRO
Connect the Touchscreen
-
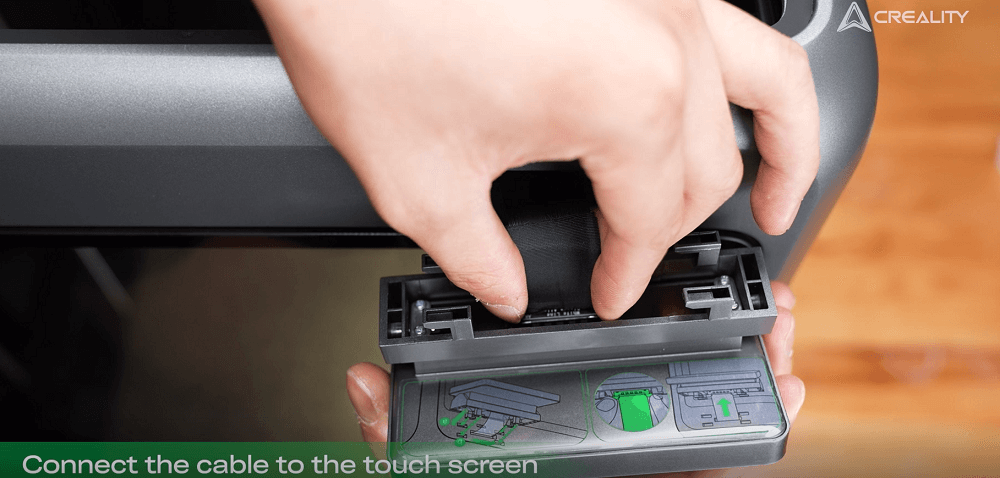
Pass the screen cable through the connection hole on the front panel.
-
Plug the cable into the touch screen.
-
Push the screen into its slot until it clicks into place.
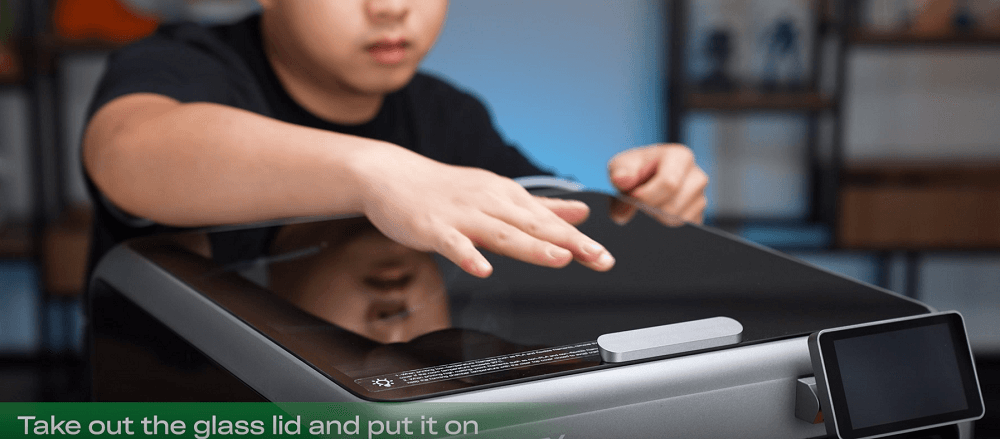
Install the Glass Lid & CFS
-
Place the glass lid on top of the printer.
-
Position the CFS unit on top of the printer frame.
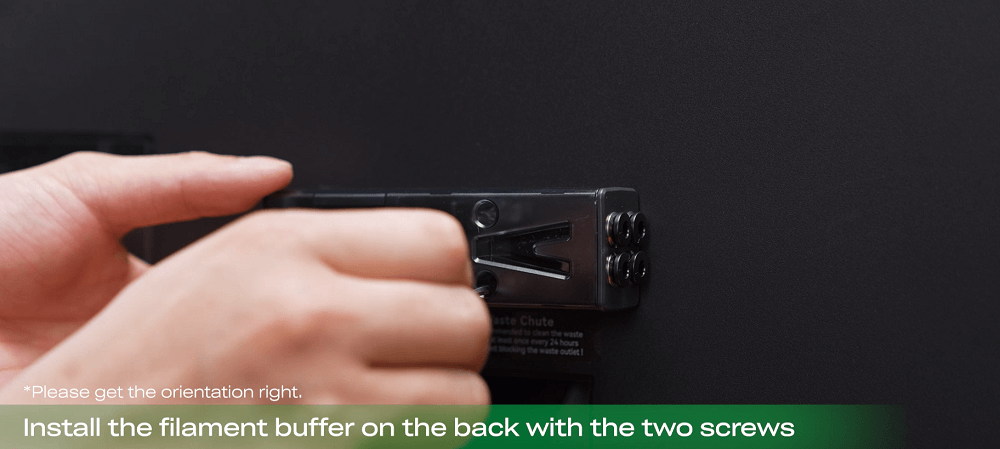
Attach the Filament Buffer
-
Prepare the filament buffer, two screws, and an Allen wrench.
-
Secure the filament buffer to the back of the printer using the screws.
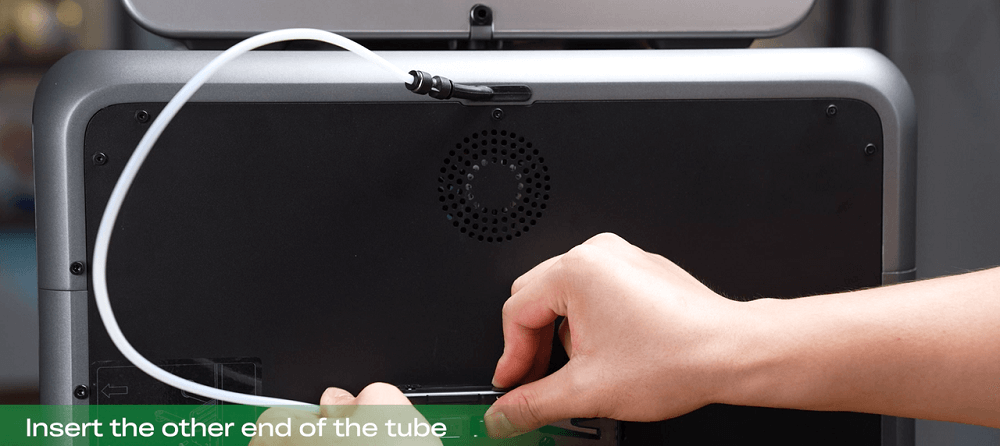
Connect the PTFE Tubes & 485 Cables
-
Insert one end of a PTFE tube into the extruder inlet.
-
Push the buffer latch to the left and insert the other end of the tube.
-
Use another PTFE tube to connect the buffer inlet to the CFS.
-
Connect the filament buffer to the CFS using the short 485 cable.
-
Connect the printer to the CFS using the long 485 cable.
Power On
-
Plug in the power cable.
-
Switch on the printer.
-
Follow the on-screen boot-up guide to complete the initial setup.

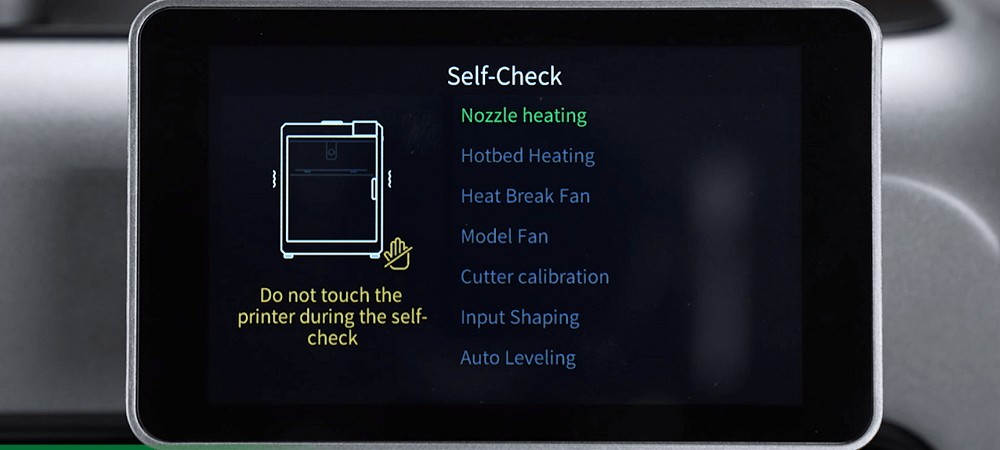
Power-On & Self-Check
Once the installation is complete, it’s time to bring the K2 Pro Combo to life. Simply switch on the printer, and it will automatically initiate a self-check. This process ensures that all key components — from motion systems to sensors — are functioning correctly before you start printing.
Allow the self-check to run to completion without interruption. When prompted, remove the protective foam beneath the heated bed to ensure proper movement during operation.
Next, install your RFID filament by inserting it into the feeding tube. The K2 Pro Combo will instantly auto-sync filament information, saving you the trouble of manual configuration. If you prefer, you can also load a non-RFID filament and manually edit the filament settings through the touchscreen interface.
With the self-check complete and filament loaded, your K2 Pro Combo is now fully prepared for its first print.
Loading Filament & First Print Test
-
Load additional filaments if needed.
-
From the touchscreen, select a local preloaded model.
-
Start the print and observe the first layer adhesion and print quality.
For best results, try using the 3DBenchy boat model — a widely recognized benchmark for 3D printer performance testing.
First Impressions & Conclusion
From unboxing to your first print, the K2 Pro Combo offers a smooth and beginner-friendly setup experience. The modular design of the components, intuitive cable connections, and the Creality Filament System make installation quick and hassle-free.
The RFID filament detection is a great touch for new users, eliminating the need for manual parameter setup. Whether you’re printing a calibration model or starting your first real project, the K2 Pro Combo is ready to deliver high-quality results right out of the box.
+1
+1
+1
+1
