
Launch & Setup
Launch the Software
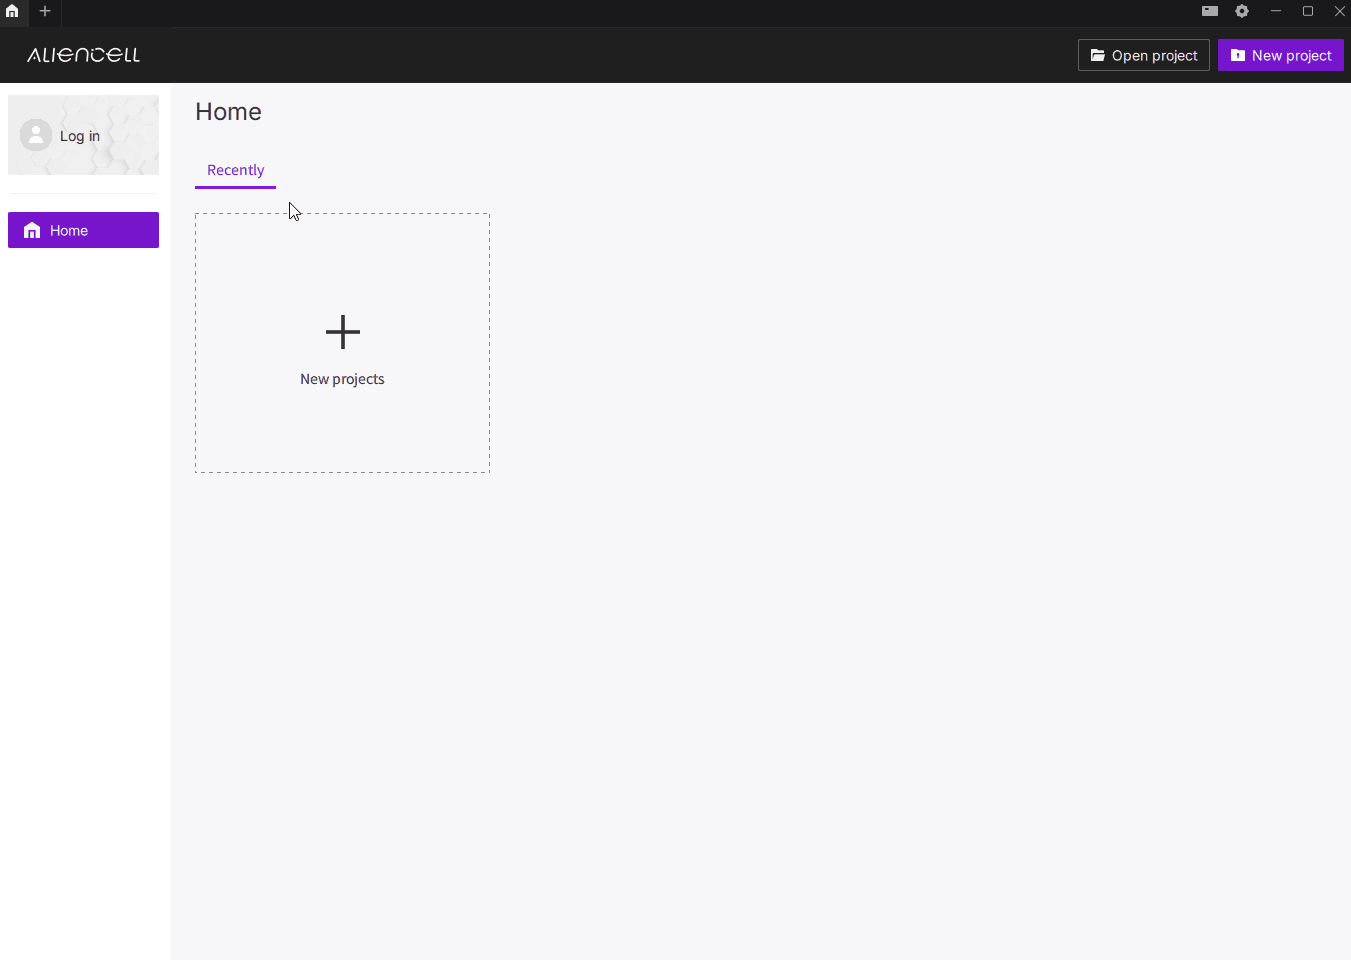
Double-click the Aliencell Space icon to start the software.

Sign In (Optional)
Log In
You can sign in to sync your preferences, or simply skip this step and use the software locally.
Create an Account
- If you don’t have an Aliencell Space account yet, you can create one directly in the software. Click Log in in the upper-left corner, then select Create account and enter your registration details.
Language Settings
If the interface is not displayed in your preferred language:
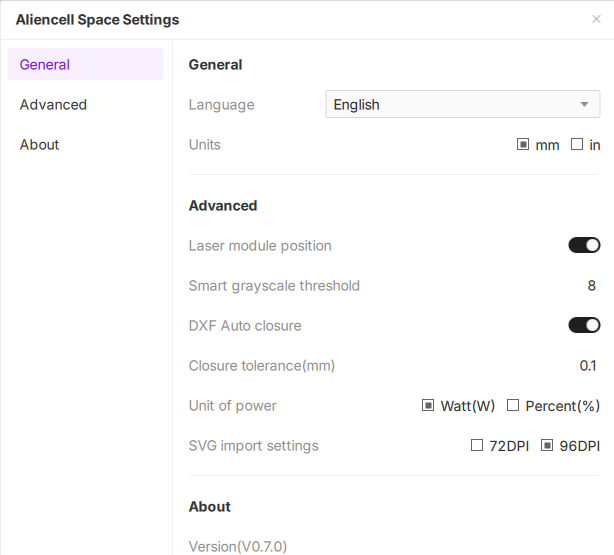
- Click the Settings icon
 in the upper-right corner.
 - In the pop-up window, find the Language option and select the language you prefer from the dropdown menu.
Create a Project & Connect Your Device
Create a New Project
Click New Project in the upper-right corner of the home page to enter the project workspace.
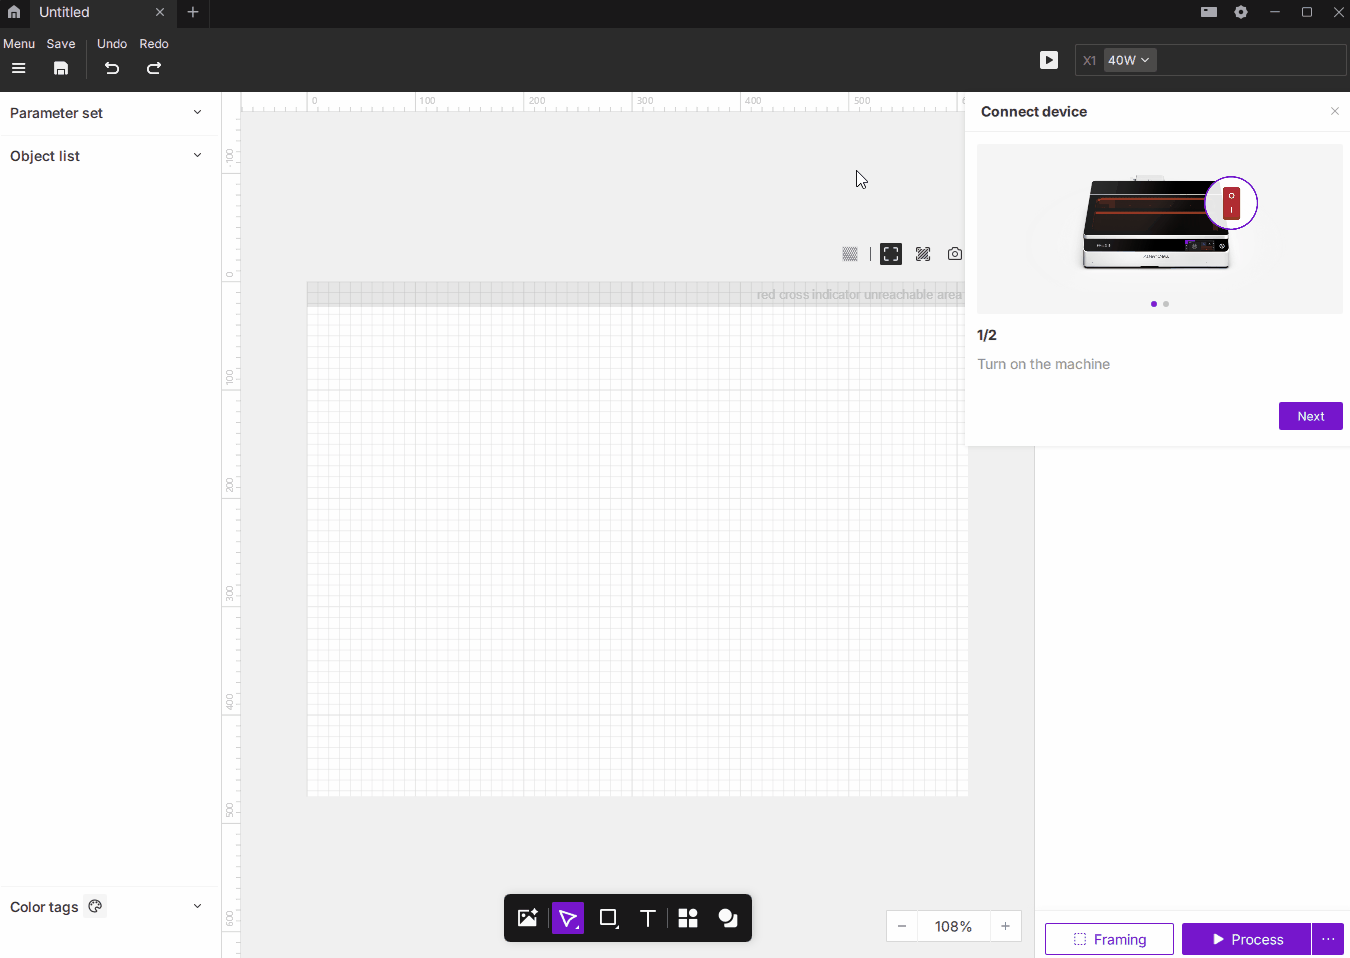
Connect a Device
When you first launch the software, a connection window will appear.
Option A: Connect a Physical Device (Recommended)
Power on the machine and connect it to your computer using a USB cable.
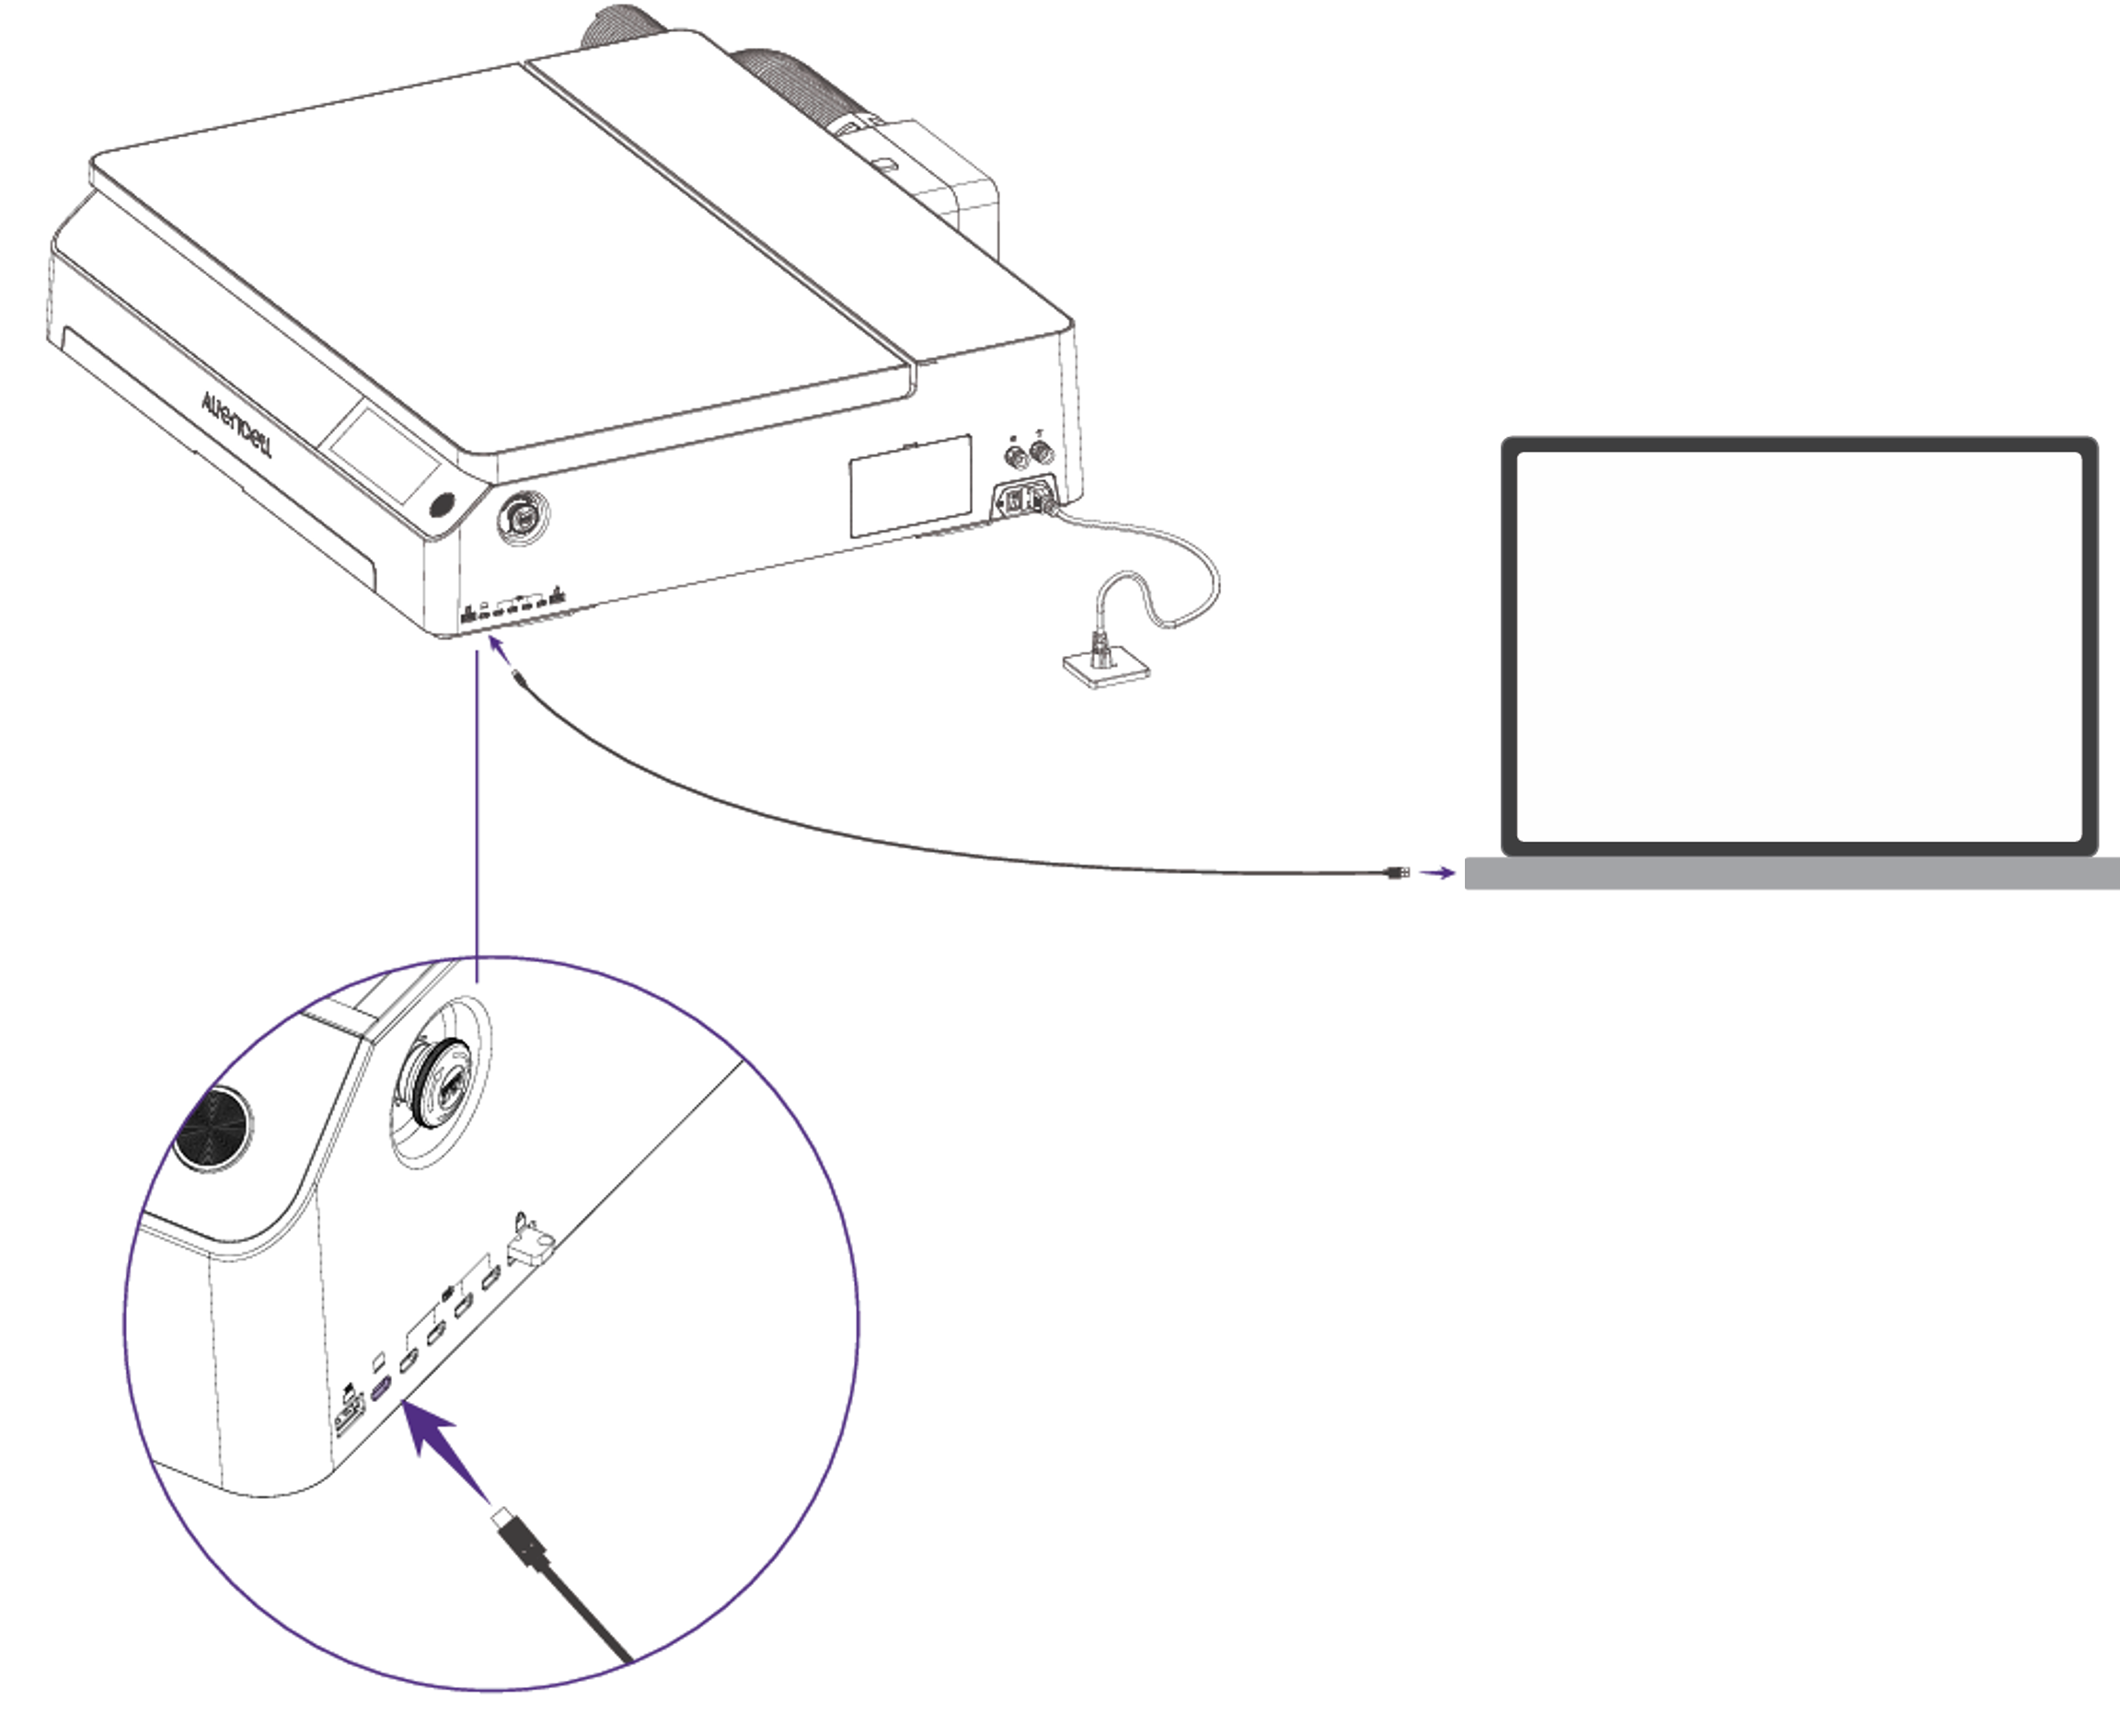
The software automatically detects devices connected via USB. Select your device in the pop-up window to complete the connection.
After connecting through USB, you can configure the device’s Wi-Fi settings in the software. Once configured, if both the device and your computer are on the same network, you can connect wirelessly in the future.
Option B: Connect a Virtual Device
If you don’t have the machine with you, select Virtual Device. This allows you to explore the interface, test parameters, and simulate engraving without hardware.
Choose the power level of your laser module (e.g., 20 W, 40 W, 60 W).
⚠️ The canvas size automatically adjusts based on the selected module’s working area.
Interface Overview
Project Workspace Overview
The project workspace is divided into several main sections. The following illustration shows the overall layout.
You can learn more about each feature in the Interface Overview.
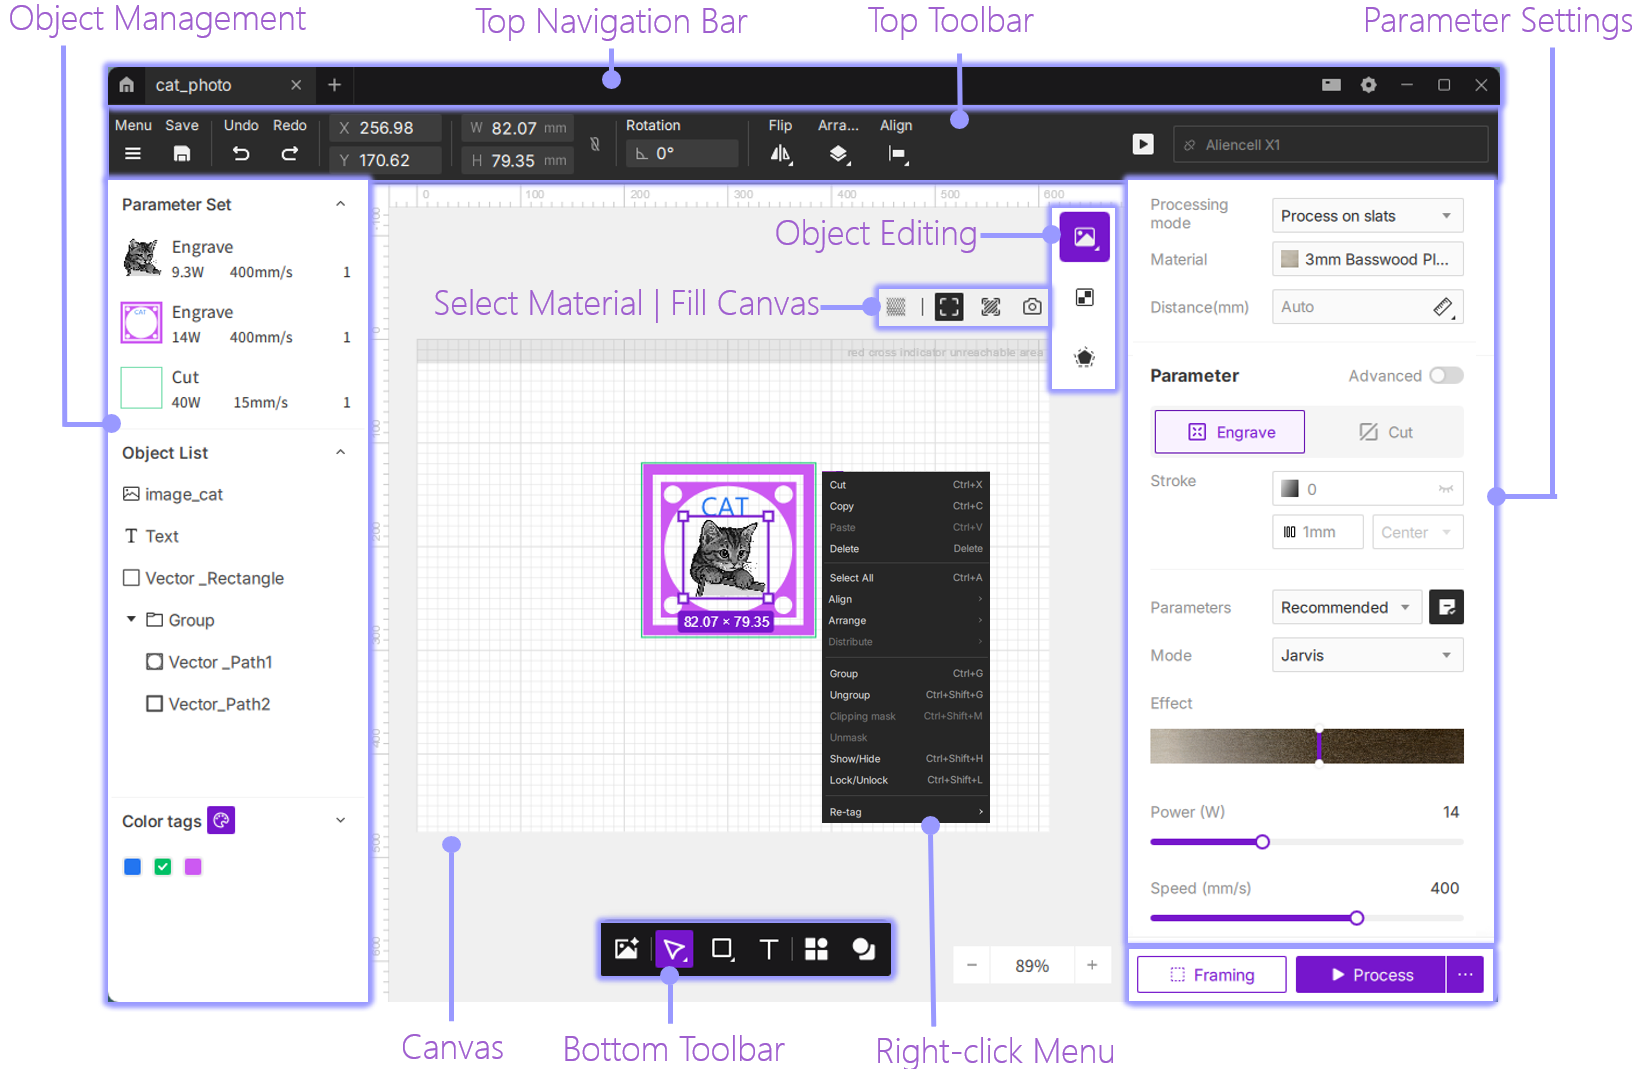
Object editing options change depending on the selected object type (image, vector shape, or text).
Design & Preparation
Import or Create Design Files
Import Files
Drag your design files directly into the canvas.
Supported formats: SVG, DXF, PNG, JPG, BMP.
Create Simple Graphics
Use the bottom toolbar to draw shapes, add text, or click Asset Library to create a design.

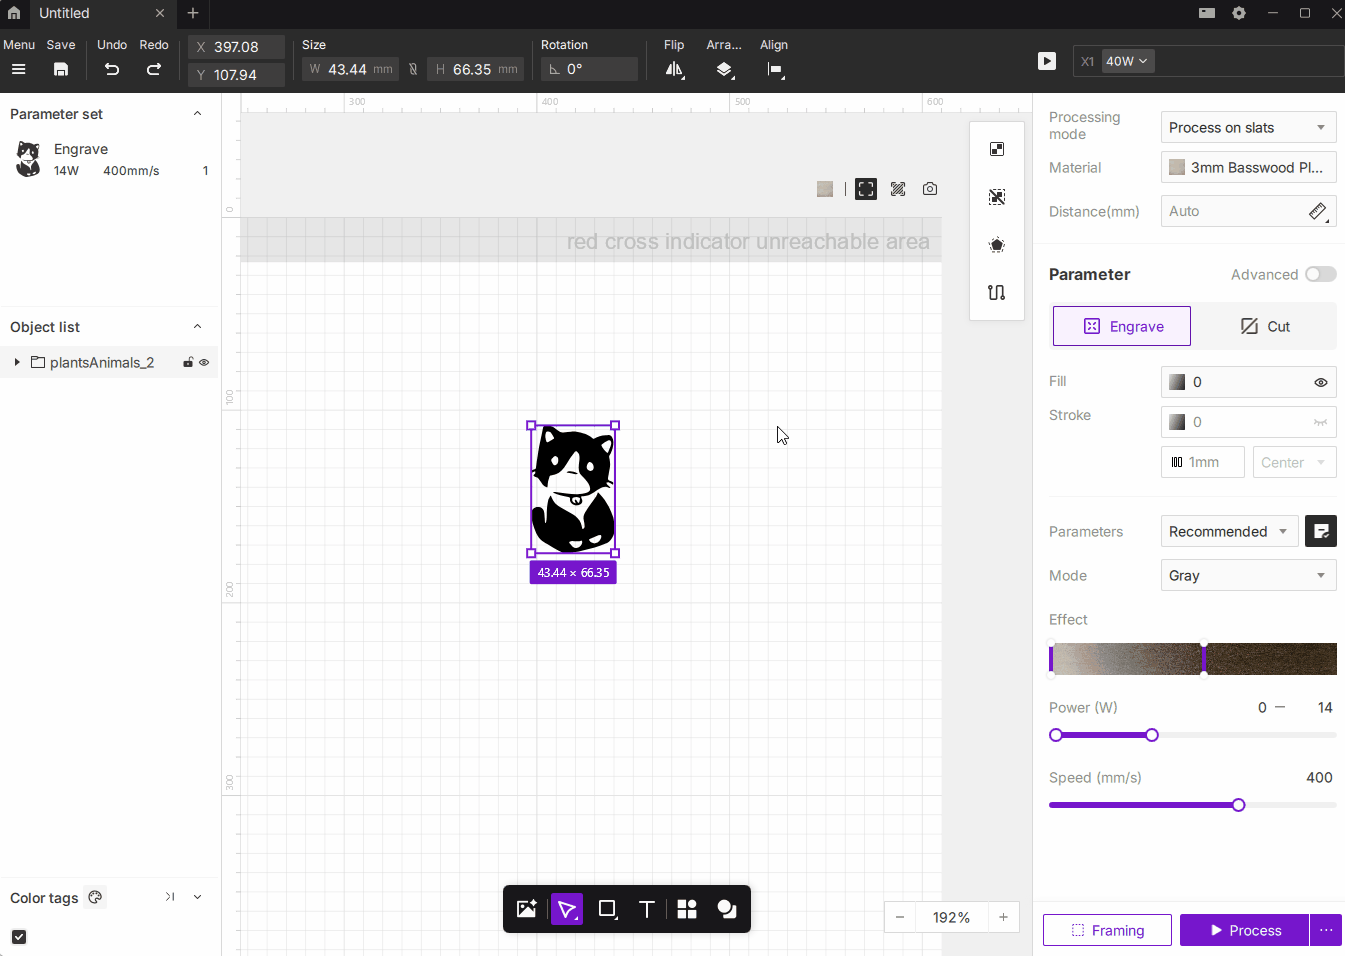
Material & Parameter Settings
- Select your object on the canvas and choose the processing mode based on your platform setup (e.g., slat work surface).
- Select Material: Choose the material you’ll be using (e.g., 3 mm basswood) from the material library.
- Processing Type: Confirm the processing type in the right-hand panel (engraving or cutting).
- Auto Parameters: When a material is selected, the software automatically applies recommended settings.
- Custom Settings: You may manually adjust power (0–100%) and speed (mm/s) for finer control.

Material Simulation
If you’re unsure about the engraving result, use Material Simulation to preview it:
- In Fill Mode, select Material Simulation, and the system generates a realistic preview based on current parameters.
- Adjust the Effect slider to simulate engraving depth and view real-time updates on the canvas.
⚠️ The Material Simulation is highly representative but not a perfect replica.
Because laser engraving involves complex nonlinear factors such as laser characteristics and material absorption, Aliencell Space aims for realistic simulation, not physical duplication.
We recommend using the preview as a starting point for professional-grade results.
Save or Export Your Project
Save the Project
Click the Save icon  or use the Save option in the menu to save the project locally.
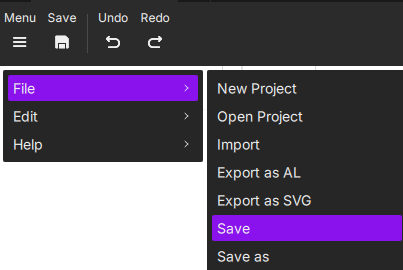
Projects are saved as .alp, which can be opened directly in Aliencell Space.
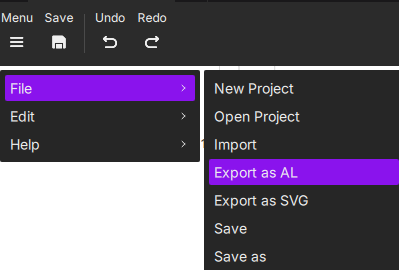
Export to USB Drive (Offline Processing)
If you want to process your job without a computer, export the project to a USB drive.
The machine can then perform offline processing.
Exported files use the .al format, which the machine reads for processing.
After setting up your design in the software, click Menu > File > Export as AL and save the file to your USB drive.
Insert the USB drive into the machine’s USB port.
On the touchscreen, go to Files > External Storage to locate your project.
Select the file to begin processing — no computer needed.
Positioning & Framing
⚠️ Make sure your physical device is connected before performing the following steps.
Camera Preview
Use the built-in camera for precise placement.
- Place your material inside the work area.
- Click Capture/Refresh above the canvas.
- The software captures the current workspace and displays it as the background.
- Drag your design onto the material area to align it accurately.

Frame the Outline
Verify the physical working area before engraving:
- Click the
 button.
 - The laser module moves along the outline of your design to preview the processing range.
- Watch the laser pointer trace to confirm it stays fully within your material. If not, adjust your material or design accordingly.
Start Processing
Begin the Job
- Click the
 icon. The software slices the file and sends the job to your device.
 - Safety confirmation: Once the file is sent, press the machine’s Start button (next to the touchscreen) to begin the laser job.
