


- Shipping Company Estimated Delivery Time Shipping Cost
Trusted Shipping Partners:  and more


Highlights
Anycubic Kobra S1 Combo - Your first fully-enclosed multicolor 3D printer
The ANYCUBIC KOBRA S1 Combo (S1C) 3D printer is a fully enclosed CoreXY model known for its high print speeds of up to 600mm/s and quality multicolor printing capabilities, all at an affordable price point. With a spacious build volume of 250 x 250 x 250mm, users can easily tackle a variety of projects. The printer's 320℃ full metal hotend supports a wide range of filament types, such as PLA, ABS, PETG, ASA, and TPU, providing users with flexibility for their projects.The user-friendly touch screen interface and intuitive software make it suitable for users of all experience levels. Its sturdy frame ensures stability during printing, resulting in consistently precise prints. Overall, the ANYCUBIC KOBRA S1 Combo 3D printer is a reliable and efficient tool for creating detailed and intricate 3D prints, making it a great choice for hobbyists, makers, and professionals.
- 8-Color Printing
- 600mm/s Ultra-Fast
- 320°C Hotend
- 44dB Ultra-Quiet
- 250*250*250mm
- PLA, ABS, PETG, ASA, and TPU, etc. materials supported
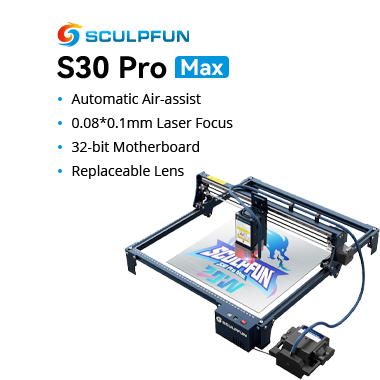
Mecpow X3 Pro 10W Laser Main Features
Mecpow X3 Pro is one of the world's first 10W laser engravers with an air assist system included, therefore its cutting capacity is greatly improved compared to its counterparts. Plus, the cutting accuracy and cutting quality are also optimized to a great extent.
- 10W Laser power
- 0.01m engraving accuracy
- 0.06x0.08mm compressed spot
- Flame sensor and tilt alarm
- Security lock
- Limit switches
- Fixed Focus
- Air assist and Air pump included

- Drying & Printing at the Same Time
- Fully Enclosed CoreXY Construction With A Print Size Of 250*250*250mm
- Stunning 4- or 8-color Printing
- Compatible with all Major Filaments
- 44dB Quiet Print Mode
- 600mm/s Ultra-Fast Printing
- 320°C Hotend, Easy to Disassemble, Clog-Free
- Free Multicolor Model Download

Off-road vehicles Model by @Anycubic
Download the model in Maker online

Stitching robot Model by @PathfinderANT
Download the model in Maker online

FPV Drone Framework Model by @PathfinderANT
Download the model in Maker online

ACE PRO for Kobra S1, More Than Just Active Drying.
- Active Drying
- Intelligent Mult-Filament Drying
- Anti-Entanglement Design
Note: Purchase of accessories required for use with ACE Pro for Kobra 3

Master of Mainstream Materials
Perfectly Supports: ASA/ABS
Weather- and high-temp-proof | Outdoor applications | High-resilience
Perfectly Supports: PLA
Environmentally friendly and non-toxic | Vibrant colors | High-precision
Perfectly Supports: PETG
Vibrant colors | Easy to print | Environmentally friendly
Perfectly Supports: TPU[1]
Soft and highly elastic | Oil- and abrasion-resist | Comfortable to the touch
[1]The characteristics of TPU filaments make them only suitable for single color, and they cannot be used together with ACE PRO for dual printing.

The Ultimate Efficiency Drying While Printing
No extra dryer is needed, the ACE PRO fully supports around-the-clock filament drying even during printing to boost efficiency to another level.

Filaments' Optimal Humidity Presets
The ACE PRO comes standard with humidity presets for various types of filaments, simply select your desired filaments and wait for the perfect result.

Perfection is One ACE PRO Away
Dual PTC heating module + 360° hot air circulation drying technology ensures even heating of the filaments, keeping them in optimal printing condition at all times to create the perfect model.
- Bubbling (undried)
- Lack of adhesion (undried)
- Clogging (undried)
- Feathering (undried)
Activate drying for only 10 minutes, humidity inside the filament box decreased from 93.2% to 42.6%*.
Printing with Dried ABS
Printing with Undried ABS
*Data provided by the Anycubic Lab)


Cr8ing Stunning Colors
The ACE PRO features 4 slots, effortlessly tackling basic four-color printing. When two ACE PROs are combined, you can then unleash eight-color printing to bring you even more unimaginable possibilities[2].
[2]It is necessary to connect two ACE PRO printers with an eight-color feeding module.

ACE PRO Got You Covered
Each filament spool is stored separately in its own slot, greatly reducing the chances of tangling due to filament retraction. Additionally, it includes a built-in buffering mechanical system to quickly detect filament entanglement and blockages, automatically pausing printing and
displaying a notification to ensure a safe printing process.[3]
[3] For a smoother multi-color printing experience, it is recommended to use plastic filament spools.

It Takes Care of the Rest
Input the filament information before printing, and when one filament spool is completely depleted, it will continue to feed from the spool with the same material and color.

Superior, Doesn't Even Begin to Describe it
CoreXY Construction + Kobra OS + Cooling System

CoreXY Construction
The seamless integration of the ultra-stable CoreXY construction, dual motor drive, and Kobra OS system greatly minimizes vibrations during printing, enhancing thee responsiveness, and precision of the extruder. This results in a smoother and more precise printing process.
LeviQ3.0
Utilizing LeviQ3.0 technology allows for effortless automatic bed leveling and automatic Z-axis offset.


Resonance Compensation
Built-in accelerometer for automatic detection of resonance frequency to eliminate resonance patterns in all models.

Flow Correction
Kobra OS includes a flow compensation feature that accurately adjusts filament extrusion, resulting in a smoother and more natural surface on the models.
Enhance printing accuracy by effectively minimizing the overflow of material at model corners and reducing virtual waste during printing.
Complete Benchy in 15mins
Recommended print speed: 300mm/s
Maximum print speed up to: 600mm/s
Maximum acceleration up to: 20000mm/s²


320°C Full-Metal Hotend
The Kobra S1 printer features a full metal hot end capable of reaching a peak temperature of 320°C. Its hotbed can consistently maintain a maximum temperature of 120°C, enabling effortless printing of filaments such as ABS, ASA, and other materials.

Clog-Free Aerospace-Grade Ceramic Composite Throat Tube
- Maximum Heat Resistance
- Low-Friction Surface

1+1+1 Cooling System
The 1+1+1 cooling system cools down models instantly for superb print quality and performance.

Tools-Free Hotend Disassembly
Now, swapping out the hotel only takes a few seconds thanks to the improved tools-free hot-end disassembly design.

It supports multiple hotend sizes and types[4]
[4] Comes with a standard 0.4mm diameter hotend; additional nozzles of different diameters like 0.2mm/0.6mm need to be purchased separately.

4 Intuitive Designs
Print, Sweep, Close, Done
The inner compartment has a dedicated cleaning channel to make cleaning out debris a walk in the park.
4.3" Touchscreen, Just Like a Smartphone
Unbox & Start Printing in 15mins
Making Progress, not Noises[5]
- Standard mode: as low as 46dB
- Quiet print mode: as low as 44dB
[5] The data provided is measured at 1 meter away from the front of the printer. Due to individual machine differences, the actual noise level may deviate from the advertised value, which is considered normal.

Rest Assured, You're in Good Hands
Al Monitoring
Instantly detects and alerts you to anomalies such as spaghetti, ensuring smooth operation.
Belt Tension Monitoring
Ensures precision by continuously checking belt status to prevent disruptions.
Seamless Operation
Automatic resume printing after power loss and interruptions, ensuring efficiency and reliability.

Anycubic Slicer Next
Anycubic Slicer Next is a software based on the Orca open-source platform, tailored for Anycubic 3D printers. It incorporates refined algorithms developed through multiple iterations to enhance slicing and printing quality.
Additionally, it supports local area network mode to ensure privacy and security.

Equipped with multiple sets of printing parameter presets for different specifications and filaments, Anycubic Slicer Next makes it effortless even for beginners to start a printing task with just a single click.

Multi-Plate Management System

The Anycubic App[6]
Remote Contro
One-click printing anywhere using your remote devices to start your print process. It supports multi-plate document parsing for more complex printings.
Remote Monitoring
Monitor the real-time printing status through the Anycubic app on your mobile devices, including cellphones, tablets, and laptops.
Elapse-Time Recording
Document the entire printing process of each layer from start to finish and share it on your social media platforms.

Parts Skipping[7], the Money Saver
The parts-skipping function is supported by three ends -the APP, slicing software, and printer.
[7] Parts skipping function is expected to launch in Q1 of 2025.

Maker online The Maker's Universe
Anycubic's self-operated model library, Maker online, offers a vast collection of high-quality model resources from over 3000 designers worldwide, all available for free.
The website is seamlessly integrated with Anycubic's slicing software[8], enabling efficient slicing with just a single click.
Maker online features cutting-edge technologies, which includes Al modeling and a mobile phone case customizer.
[8] To select models from Maker online and utilize the AnycubicSlicer slicing software, you must access a PC that already has the software installed.


Kobra S1 Combo Specification
| General | Brand: ANYCUBIC Type: 3D Printer Model: KOBRA S1 COMBO Color: Black |
| Specification | Print volume: 250*250*250mm Supporting consumables: PLA, PETG, TPU, ABS, ASA Recommended speed: 300mm/s Maximum speed: 600mm/s Maximum acceleration: 20000mm/s2 Nozzle temperature: 320℃ Hotbed temperature: 120℃ Automatic leveling: Fully automatic leveling, no need for Z-axis compensation Nozzle diameter: Standard 0.4mm, Supports 0.2/0.6/0.8mm expansion Noise: ≤46dB(Standard mode), ≤44dB(Quiet mode) Control screen: 4.3-inch capacitive touchscreen |
| Weight & Size | Product Weight: 15kg Package Weight: 18kg Kobra S1 Size: 400x410x490mm ACE Pro Size: 365.94x282.84x234.5mm Package Size(L x W x H): 53x51x56cm |
| Package Contents | 1 x 3D Printer 1 x Anycubic Color Engine Pro(ACE Pro) 1 x Spool Holder 1 x Signal Cable 4 x Filament Tube 2 x Power Cord 1 x Anti-blocking Module 2 x M2.5*25 Screws 2 x M3*6 Screws 1 x U-Disk 1 x 2.5/2.0/1.5 Wrench 1 x Filament Sample 1 x Nozzle Cleaner 1 x Grease 1 x Activated Carbon 1 x Nozzle Cleaning Module 1 x Nozzle Silicone Part 2 x Cable Organizer 1 x User Manual |
X3 Pro Specifications
|
General |
Brand: Mecpow |
|
Specification |
Frame Material: High-Strength Aluminium Alloy |
|
Features |
Alarm: Yes |
|
Weight & Size |
Product Weight: 3.67 kg |
|
Package Contents |
1 x Laser Engraving Machine (Unassembled) |
Videos
Customer Photos

Customer Videos
Customer Reviews
Questions & Answers
FAQ
Kobra S1 Combo
Q: What steps should be taken during the first startup?
A: Start with PID tuning, then perform feedback compensation, and finally click on auto-leveling. After that, you can begin your printing path. The entire process takes about 10 minutes.
Q: What materials can the Kobra S1 Combo print?
A: It can perfectly print PLA, PETG, TPU (95A), ABS, and ASA. Additionally, it supports high-temperature materials such as PC, PA, carbon fiber, and glass fiber.
Q: Does the Kobra S1 Combo have power-loss recovery and filament runout detection?
A: Yes, the machine supports both power-loss recovery and filament runout detection functions.
Q: How many colors does this machine support for printing?
A: With the addition of ACE Pro, it supports multi-color printing. By connecting up to two ACE Pro, it can achieve 8-color printing.
Q: Will the inside of the machine's enclosure be too dark?
A: The machine comes with built-in LED lights. You can turn on the LED lights to observe the model, and they also provide illumination for the time-lapse photography feature.
Q: Is the printer noisy during operation?
The machine operates at a noise level of approximately 44dB.
Q: What is the printing speed of Kobra S1 Combo?
A: The recommended printing speed is 300 mm/s, with a maximum printing speed of up to 600 mm/s and a maximum acceleration of 20,000 mm/s². The time to print a small boat (layer height 0.2 mm) is approximately 13 minutes.
Q: What is the printing layer thickness of the Printer?
A: The standard nozzle is 0.4 mm, and it supports a printing layer thickness range of 0.05mm to 0.28mm.
Mecpow X3 Pro
1. LaserGRBL and Lightburn fail to connect to the laser engraver after successful driver installation.
Check if the Emergency Stop button is pressed. If it is, turn it clockwise to pop it up and then reconnect the laser engraver.
2. The LaserGRBL software suddenly stops during the engraving process.
A. Check whether the product is still connected to LaserGRBL.
B. Check whether the power supply is on and whether the red indicator light on the laser module is on.
C. Check whether the driver is installed successfully.
3. LaserGRBL fails to connect to the product.
A. Check if the driver has been installed on the computer.
B. Confirm whether the baud rate is 115200 and the port selection is COM3.
C. Check whether the USB cable is not plugged properly or damaged. Replace the USB cable if it is damaged.
4. The machine moves normally, but the laser does not light.
A. Check whether the wire connecting to the laser module is loose;
B. Adjust the laser power to the maximum.
5. Engraving or cutting does not achieve the desired effect.
A. Check if the laser focal length is correctly adjusted.
B. To achieve a better effect, we suggest following the recommended operating parameters in the user
manual.
C. Check if the laser lens is covered by foreign objects and keep it clean and clear.
D. Confirm whether the software settings are wrong (for Lightburn).
E. If the material for engraving or cutting is distorted and uneven, please ensure it is flat and even before proceeding.
F. The cutting speed is not recommended to be lower than 120 mm/min. For cutting thicker materials, we suggest cutting them in separate passes. If the speed is too low, it may cause serious burning around the cutting edge.
6. LightBurn fails to connect to the product.
A. Make sure the driver has been installed. You can install it from the following link:
https://mecpow.com/pages/driver-files. Once the driver is successfully installed, you should see "COM3" in the port selection.
B. Check if the baud rate is 115200.
C. Check whether the USB cable is plugged improperly or damaged. Replace the USB cable if it is damaged.
7. The LightBurn software suddenly stops during the engraving process.
A. Check that the product is still connected to LightBurn.
B. Check if the power supply is on and the the red indicator light on the laser module is on.
8. The alarm sounds and flashes.
A. Check if the emergency stop button is pressed. If yes, turn it clockwise to pop up the emergency stop button.
B. Check if the flame sensor is triggered by a fire in the engraving area.
C. Check that the engraver is not tilted beyond 50±5° and triggering the alarm.
D. If all the above problems are settled, press the reset button to reset the machine.
9. What are the causes of frequent false alarms?
Bright light or direct sunlight may cause the flame sensor to falsely trigger the alarm. Reducing the ambient light brightness can effectively avoid false alarms. If you can't change the ambient light brightness, please switch off the flame sensor.
10. How to set up LightBurn so that the the laser head does not return to the home position after power on?
Click "Edit" - "Machine Settings" and a window will pop up. Switch the homing cycle from "True" to "False". Then click the "Write" button below and click "OK" to complete the setting.
11. The engraved image is distorted.
A. The timing belts are not tightened, resulting in slippage.
B. The wheels are loose, causing slippage.
C. The timing belts or pulleys are defective.
12. The laser does not stop moving after hitting the limit switch.
A. The connection of the limit switch is poor. Re-connect it.
B. Check if the limit switch is damaged.
13. There are noises during the engraving process.
A. Check if the noise is coming from the motor. If it is coming from the motor, replace the motor.
B. Check whether the screws on both sides of the X-axis are fixed tightly.
14. What is the MicroSD port on the control box used for?
A. It is mainly used for updating the firmware of the engraving machine.
B. When using the app to control the engraving machine, it is necessary to store the engraving files in the MicroSD card and insert the card into the MicroSD port.
15. Does the machine require maintenance?
A. The laser module has a regular life expectancy of 10,000 hours or more. The service life can be affected by the environment. When the lens of the laser module is found to be scorched yellow or blurred, it needs to be replaced.
B. Regularly check the fit tightness of the timing belts and pulleys.
C. Regularly check whether the belts are notched or bent. The belts are equipped with steel wires, and bending is likely to cause the wires to break.
16. Can the engraving machine engrave on the metal surface?
For stainless steel, laser engraving can be done directly on its surface. Other metals, such as iron, aluminum, and copper, can only be carved with a coating applied to their surface.
17. Can the product cut through metal?
No.
18. How to maintain the laser module?
A. Maintain the laser head by regularly cleaning or replacing the lens.
B. The regular service life of the laser module is more than 10,000 hours. For better engraving effects, we recommend that you replace the laser module after use of 10,000 hours.
19. How to make sure that the engraving range is within the engraved object?
Click "Frame" to preview the engraving range. If the engraving range is beyond the engraved object, move the object or the laser head to adjust it.
20. Can the engraving machine be used on an iPad?
No.
21. Can the machine engrave on glass or ceramics?
Yes. Glass needs to be painted on the surface and ceramic needs to be applied with heat transfer paper on the surface.
22. Is it possible to engrave on coating layers?
Yes. For coated layers, the engraving speed must be fast. For grayscale images, we recommend that you use LightBurn for engraving. Grayscale engraving with LaserGRBL is much slower, so the engraving results will not be as good.
23. Can you engrave on a 3D object, such as a water bottle?
Yes. It needs to be used with a rotary roller. Connect the rotary roller to the Y-axis motor.
24. How often should I replace the lenses of the laser module?
Smudged lenses can seriously affect the quality of engraving or cutting. Thus, we recommend that you replace the lenses once a month.
25. What if the laser module is not raised high enough?
Loosen the screws in the dovetail groove on the back of the laser module. Then move the dovetail groove down to the screw holes below. Insert the screws into the screw holes and tighten the screws to secure the dovetail groove.